Category Archives: Forking Recipes

Interesting twists on everyday things as well as the unusual

Delicious Pickled Jalapeños Recipe


Delicious Pickled Jalapeños

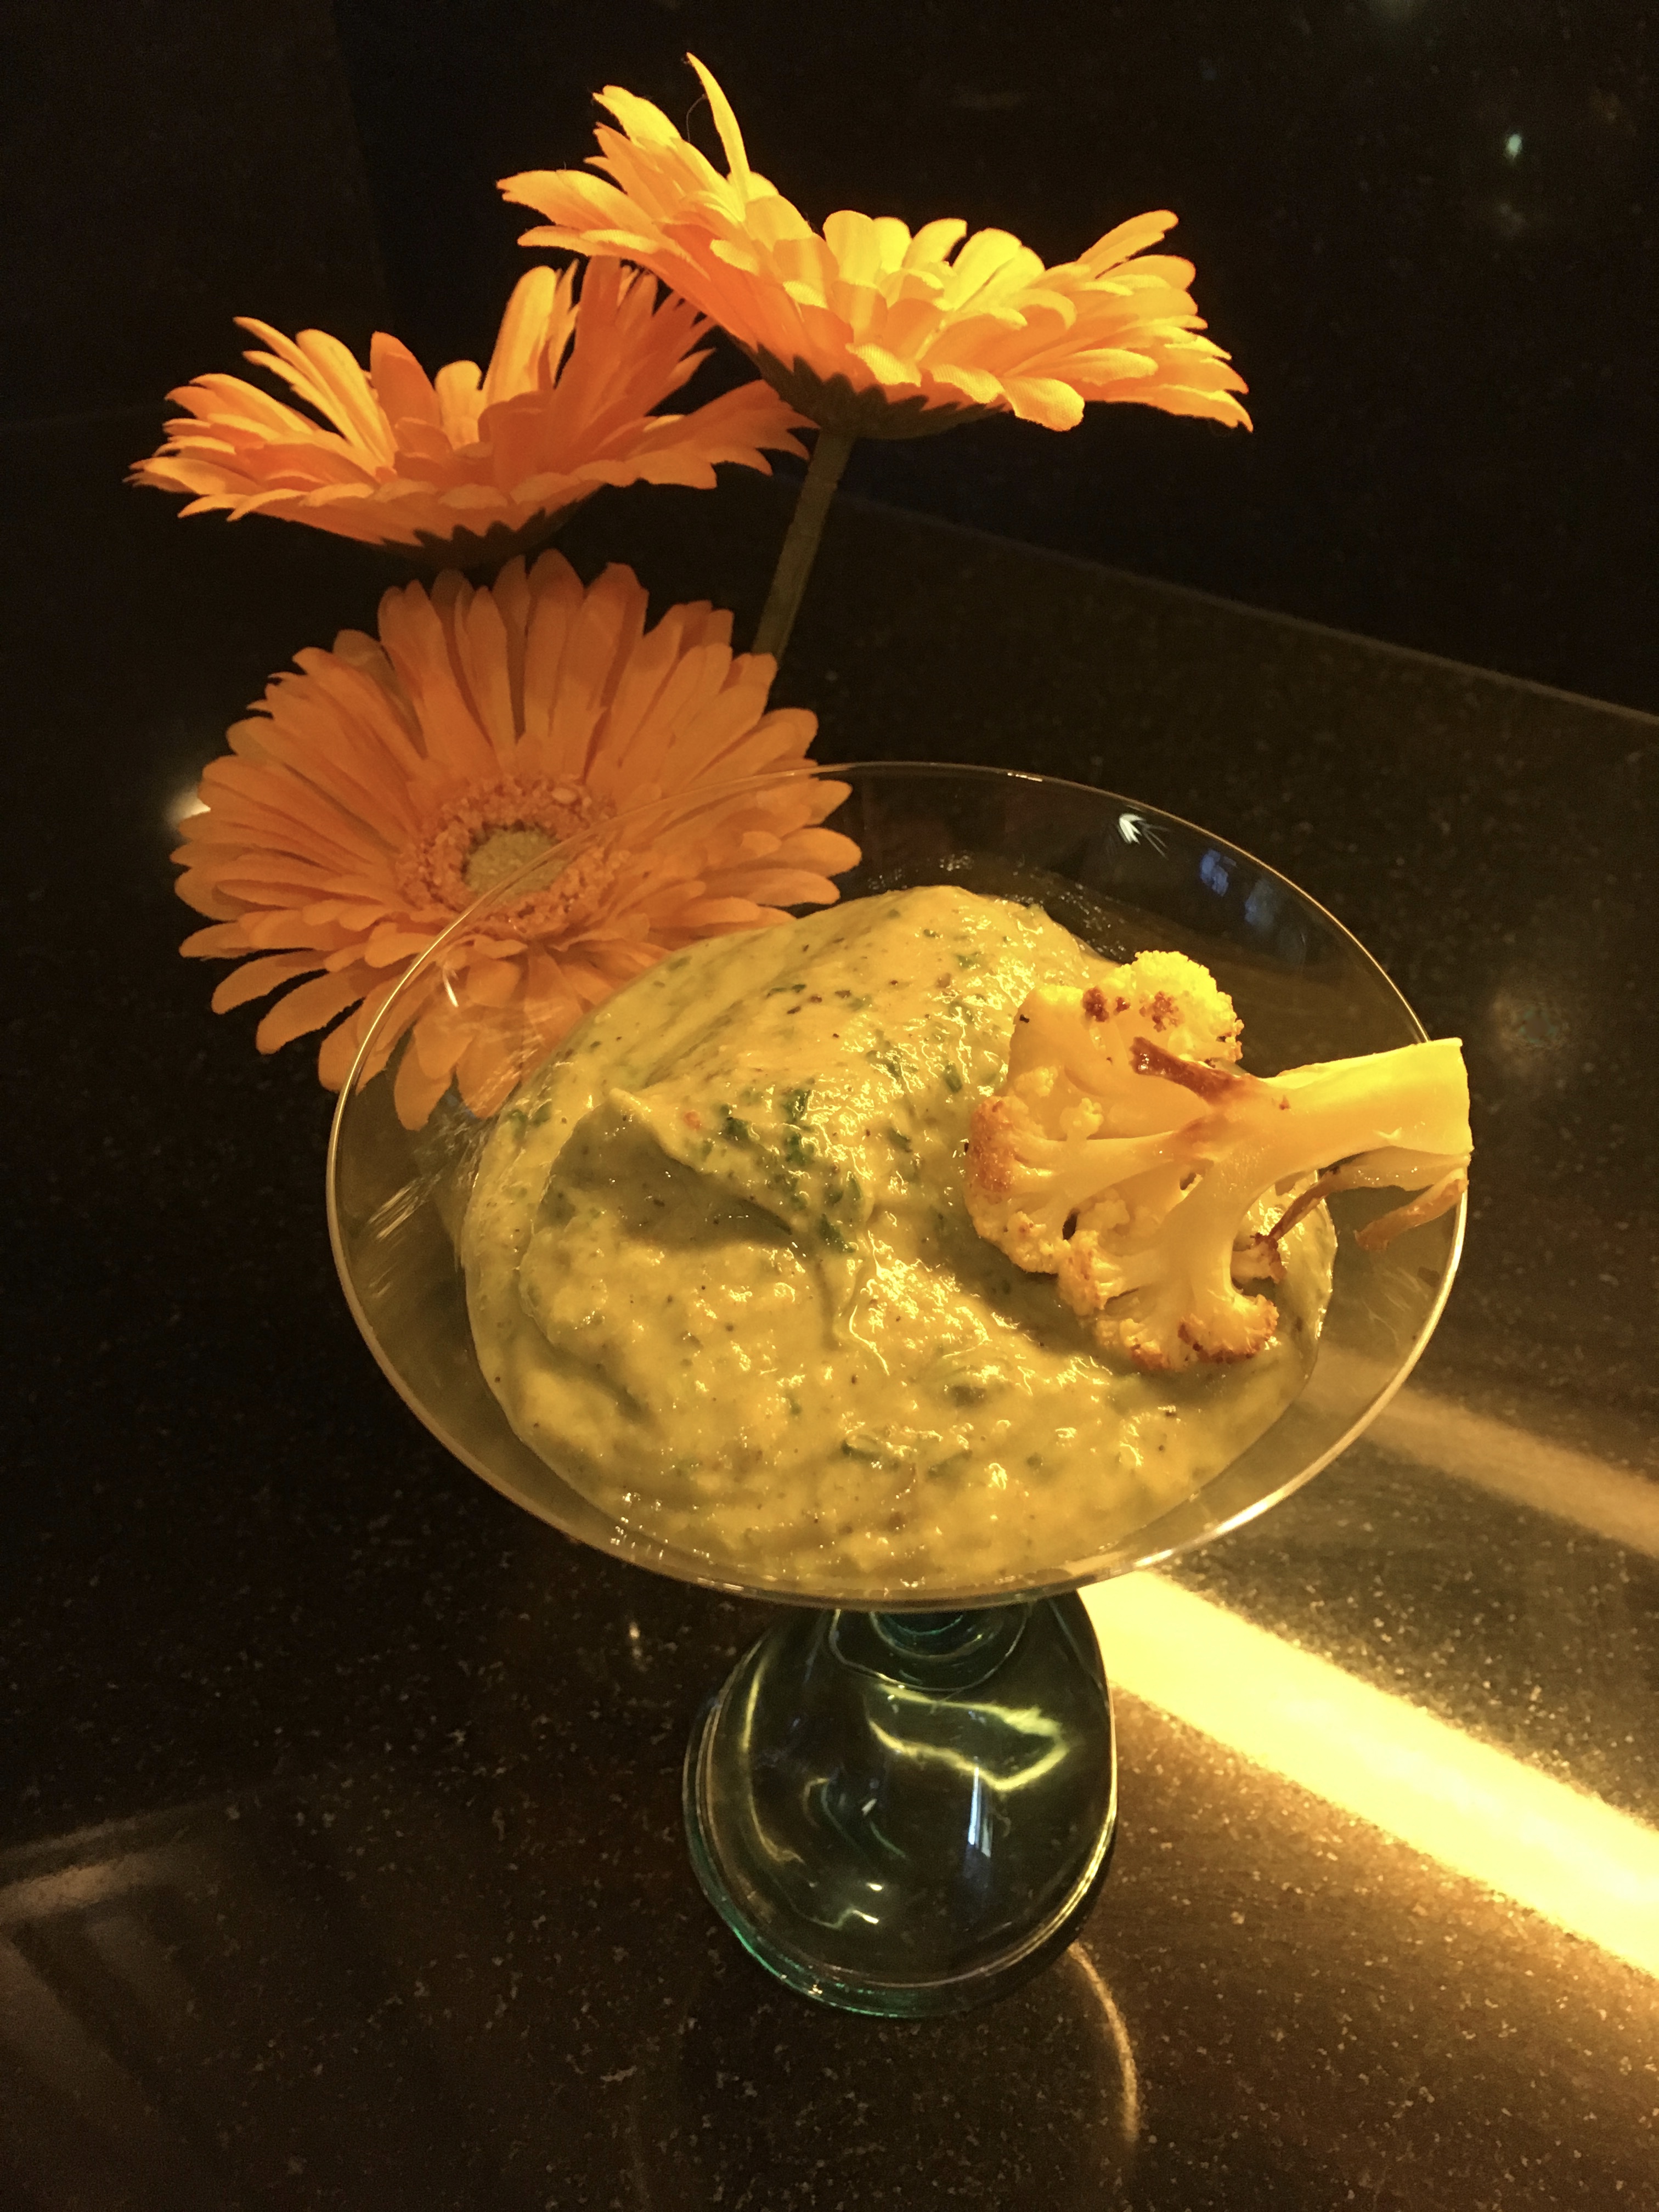
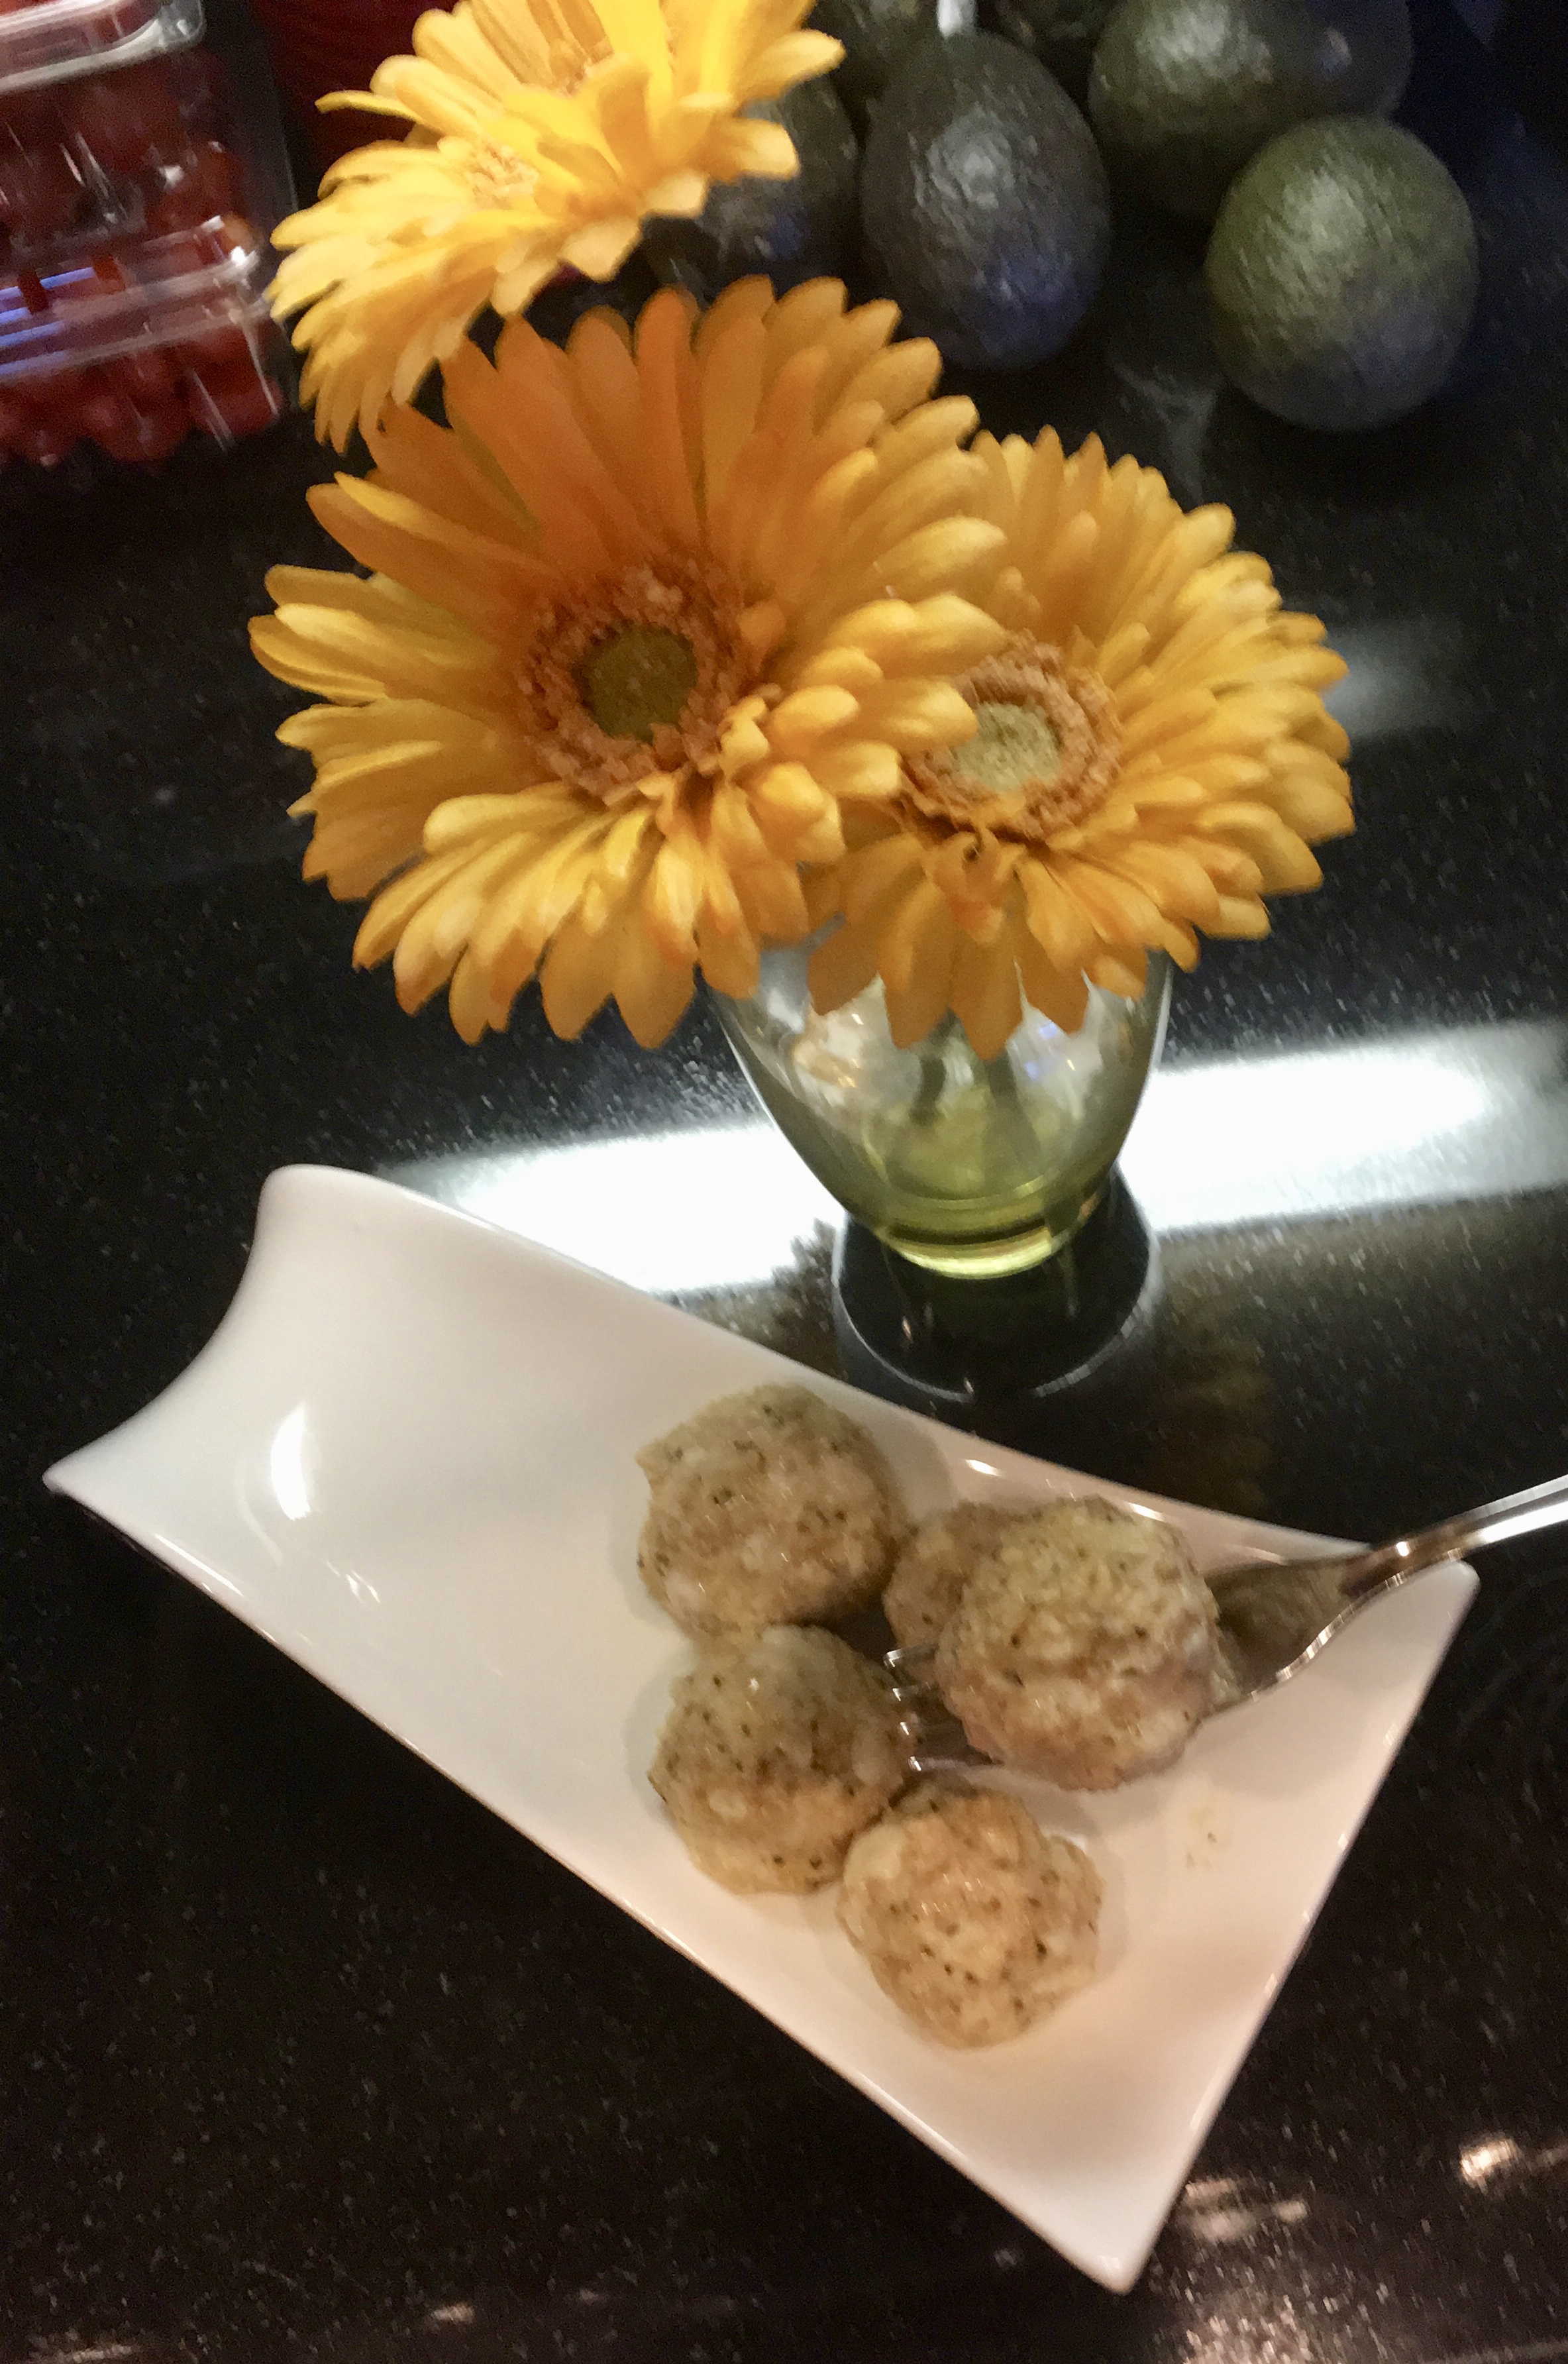
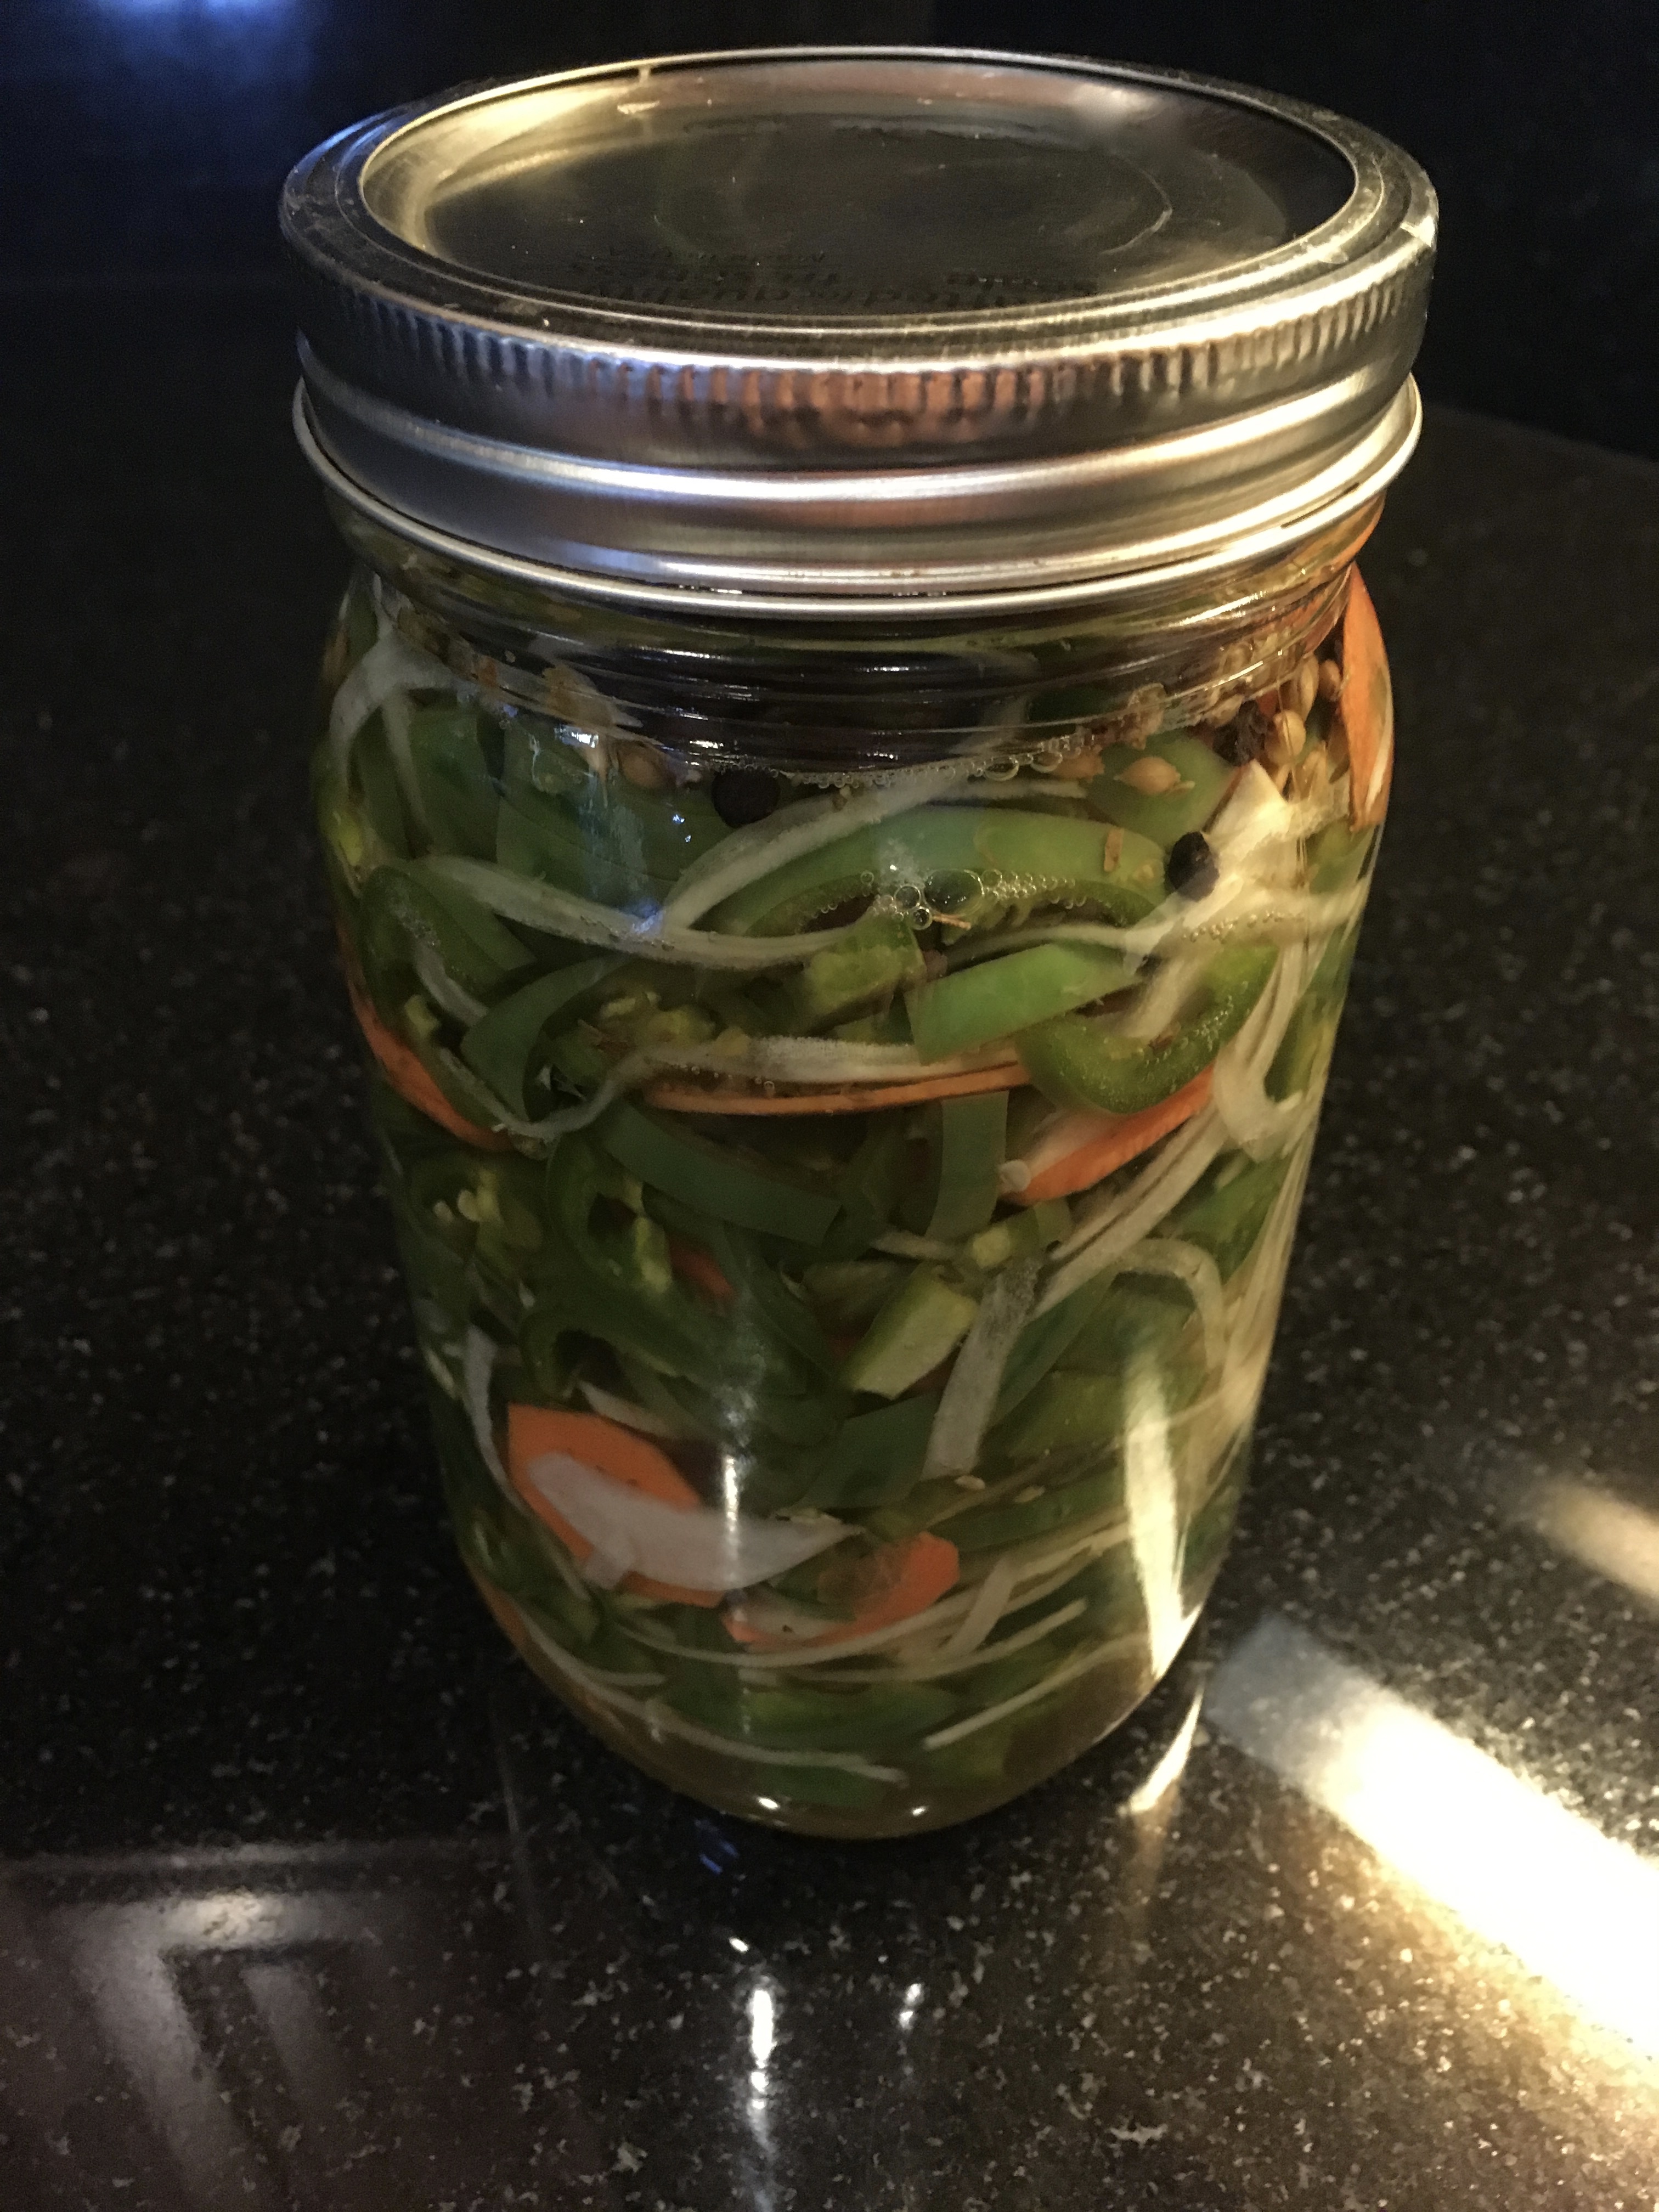
I got a bunch of Jalapeños that are HOT so I thought I’d pickle some of them. These Pickled Jalapeños are so delicious you can easily made lots of foods delicious with them easily. I do recommend to wear gloves because when you handle so many jalapeños because you will injure yourself. Your hands will burn the next day too so wear gloves. The recipe is pretty easy and you don’t really have to do the canning process because with all the vinegar it will stay fresh for several months or do the canning process if you prefer. I found out later that these Pickled Jalapeños make some VERY DELICIOUS Guacamole….It’s one of my new tricks! The other is that these Delicious Pickled Jalapeños help to make a really awesome chicken salad. I didn’t write down exactly how I made it but the chicken salad was made of pulled chicken, a good amount of the pickled jalapeños, dijon mustard, celery, green onions and a little water that emulsified with the dijon. I stuffed the chicken salad into mini bell peppers and it was Forking Great!

Ingredients for about 20 servings

1 lb jalapeños – cleaned, stems and cores removed and cut into rings

2 cups white vinegar

2 cups rice wine vinegar

2 cups water

4 Tablespoons kosher salt

1/2 cup sugar

1/2 sweet onion – cut in thin slices

6 cloves garlic – smashed

1 Tablespoon black peppercorns

1 Tablespoon coriander seeds

2 bay leaves

1 carrot – peeled and sliced very thin

1 teaspoon dried oregano

Directions

Set the Jalapeños carrots and onions in a large bowl and set to the side.

Get your large sauce pot on medium high heat with remaining ingredients and bring to a boil till sugar dissolves.

Reduce to simmer and let it go about ten minutes.

Place vegetables in containers. Add liquid. Place lids on when it’s cool.

Pickled Jalapeños

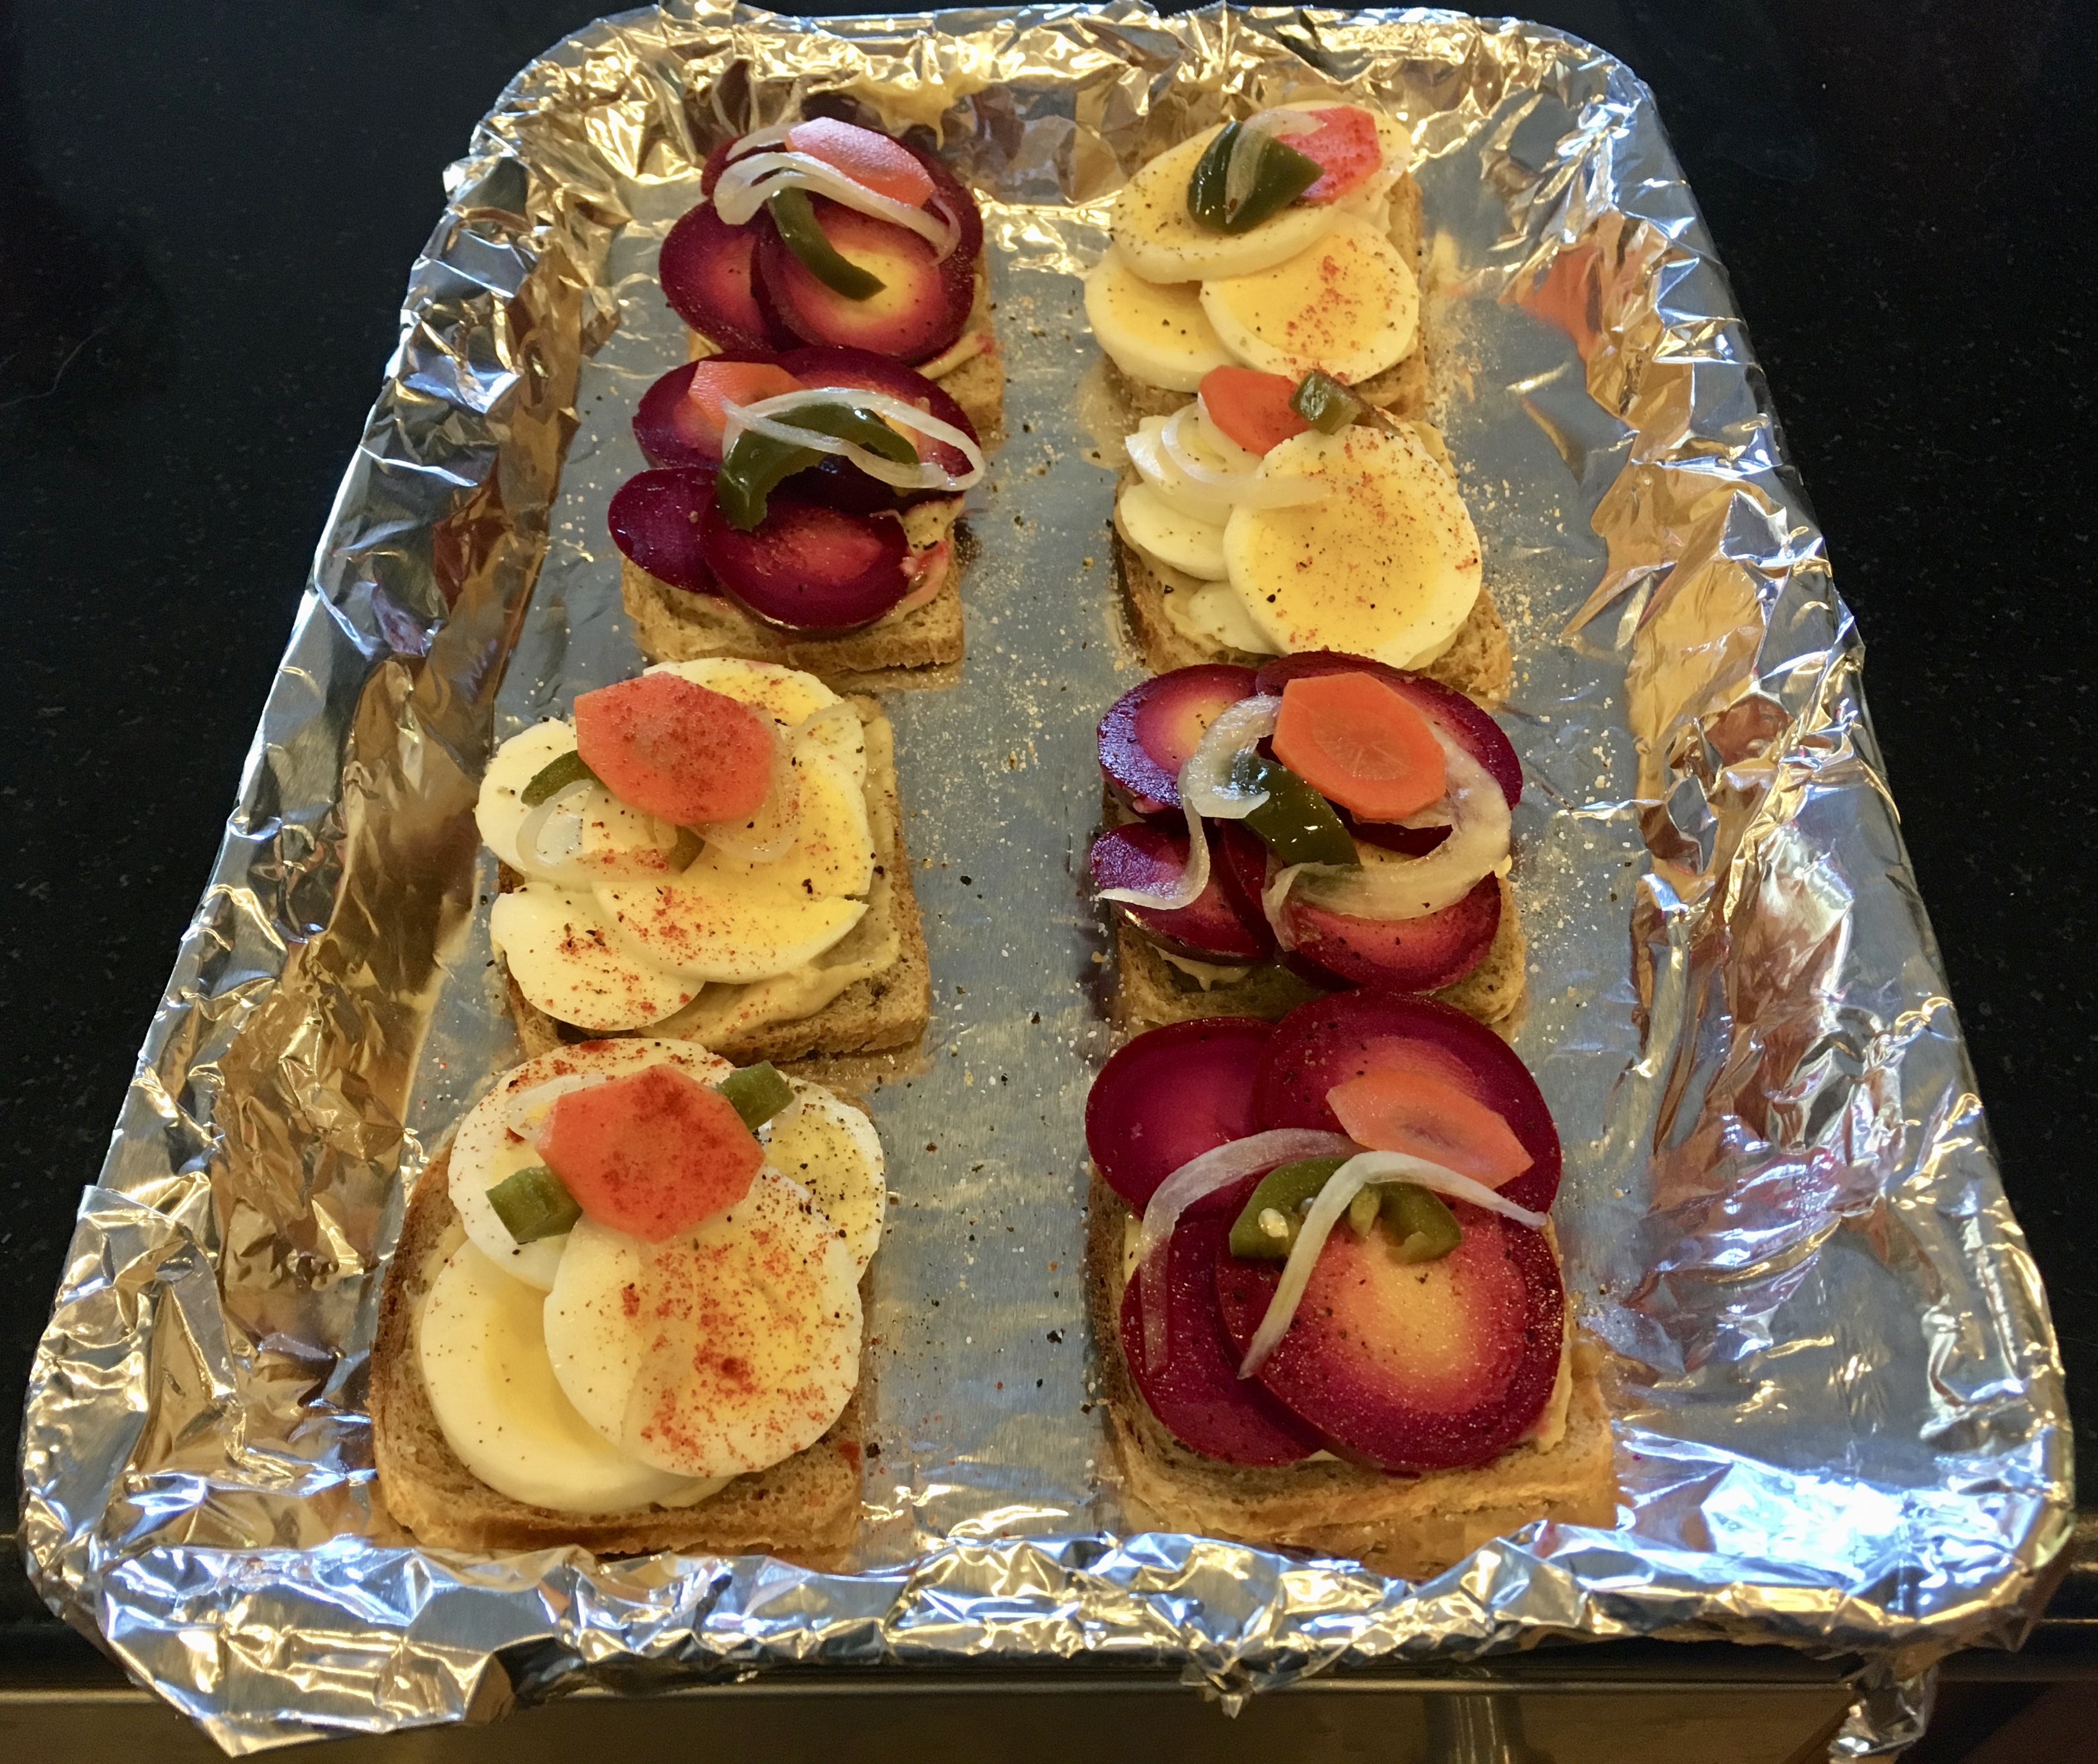
These were once jalapeños that were to hot to eat and now they are a yummy kinder heat that’s layered in flavor and delicious.

I found they add something super special to home made guacamole and they also are great in chicken salad and MORE!

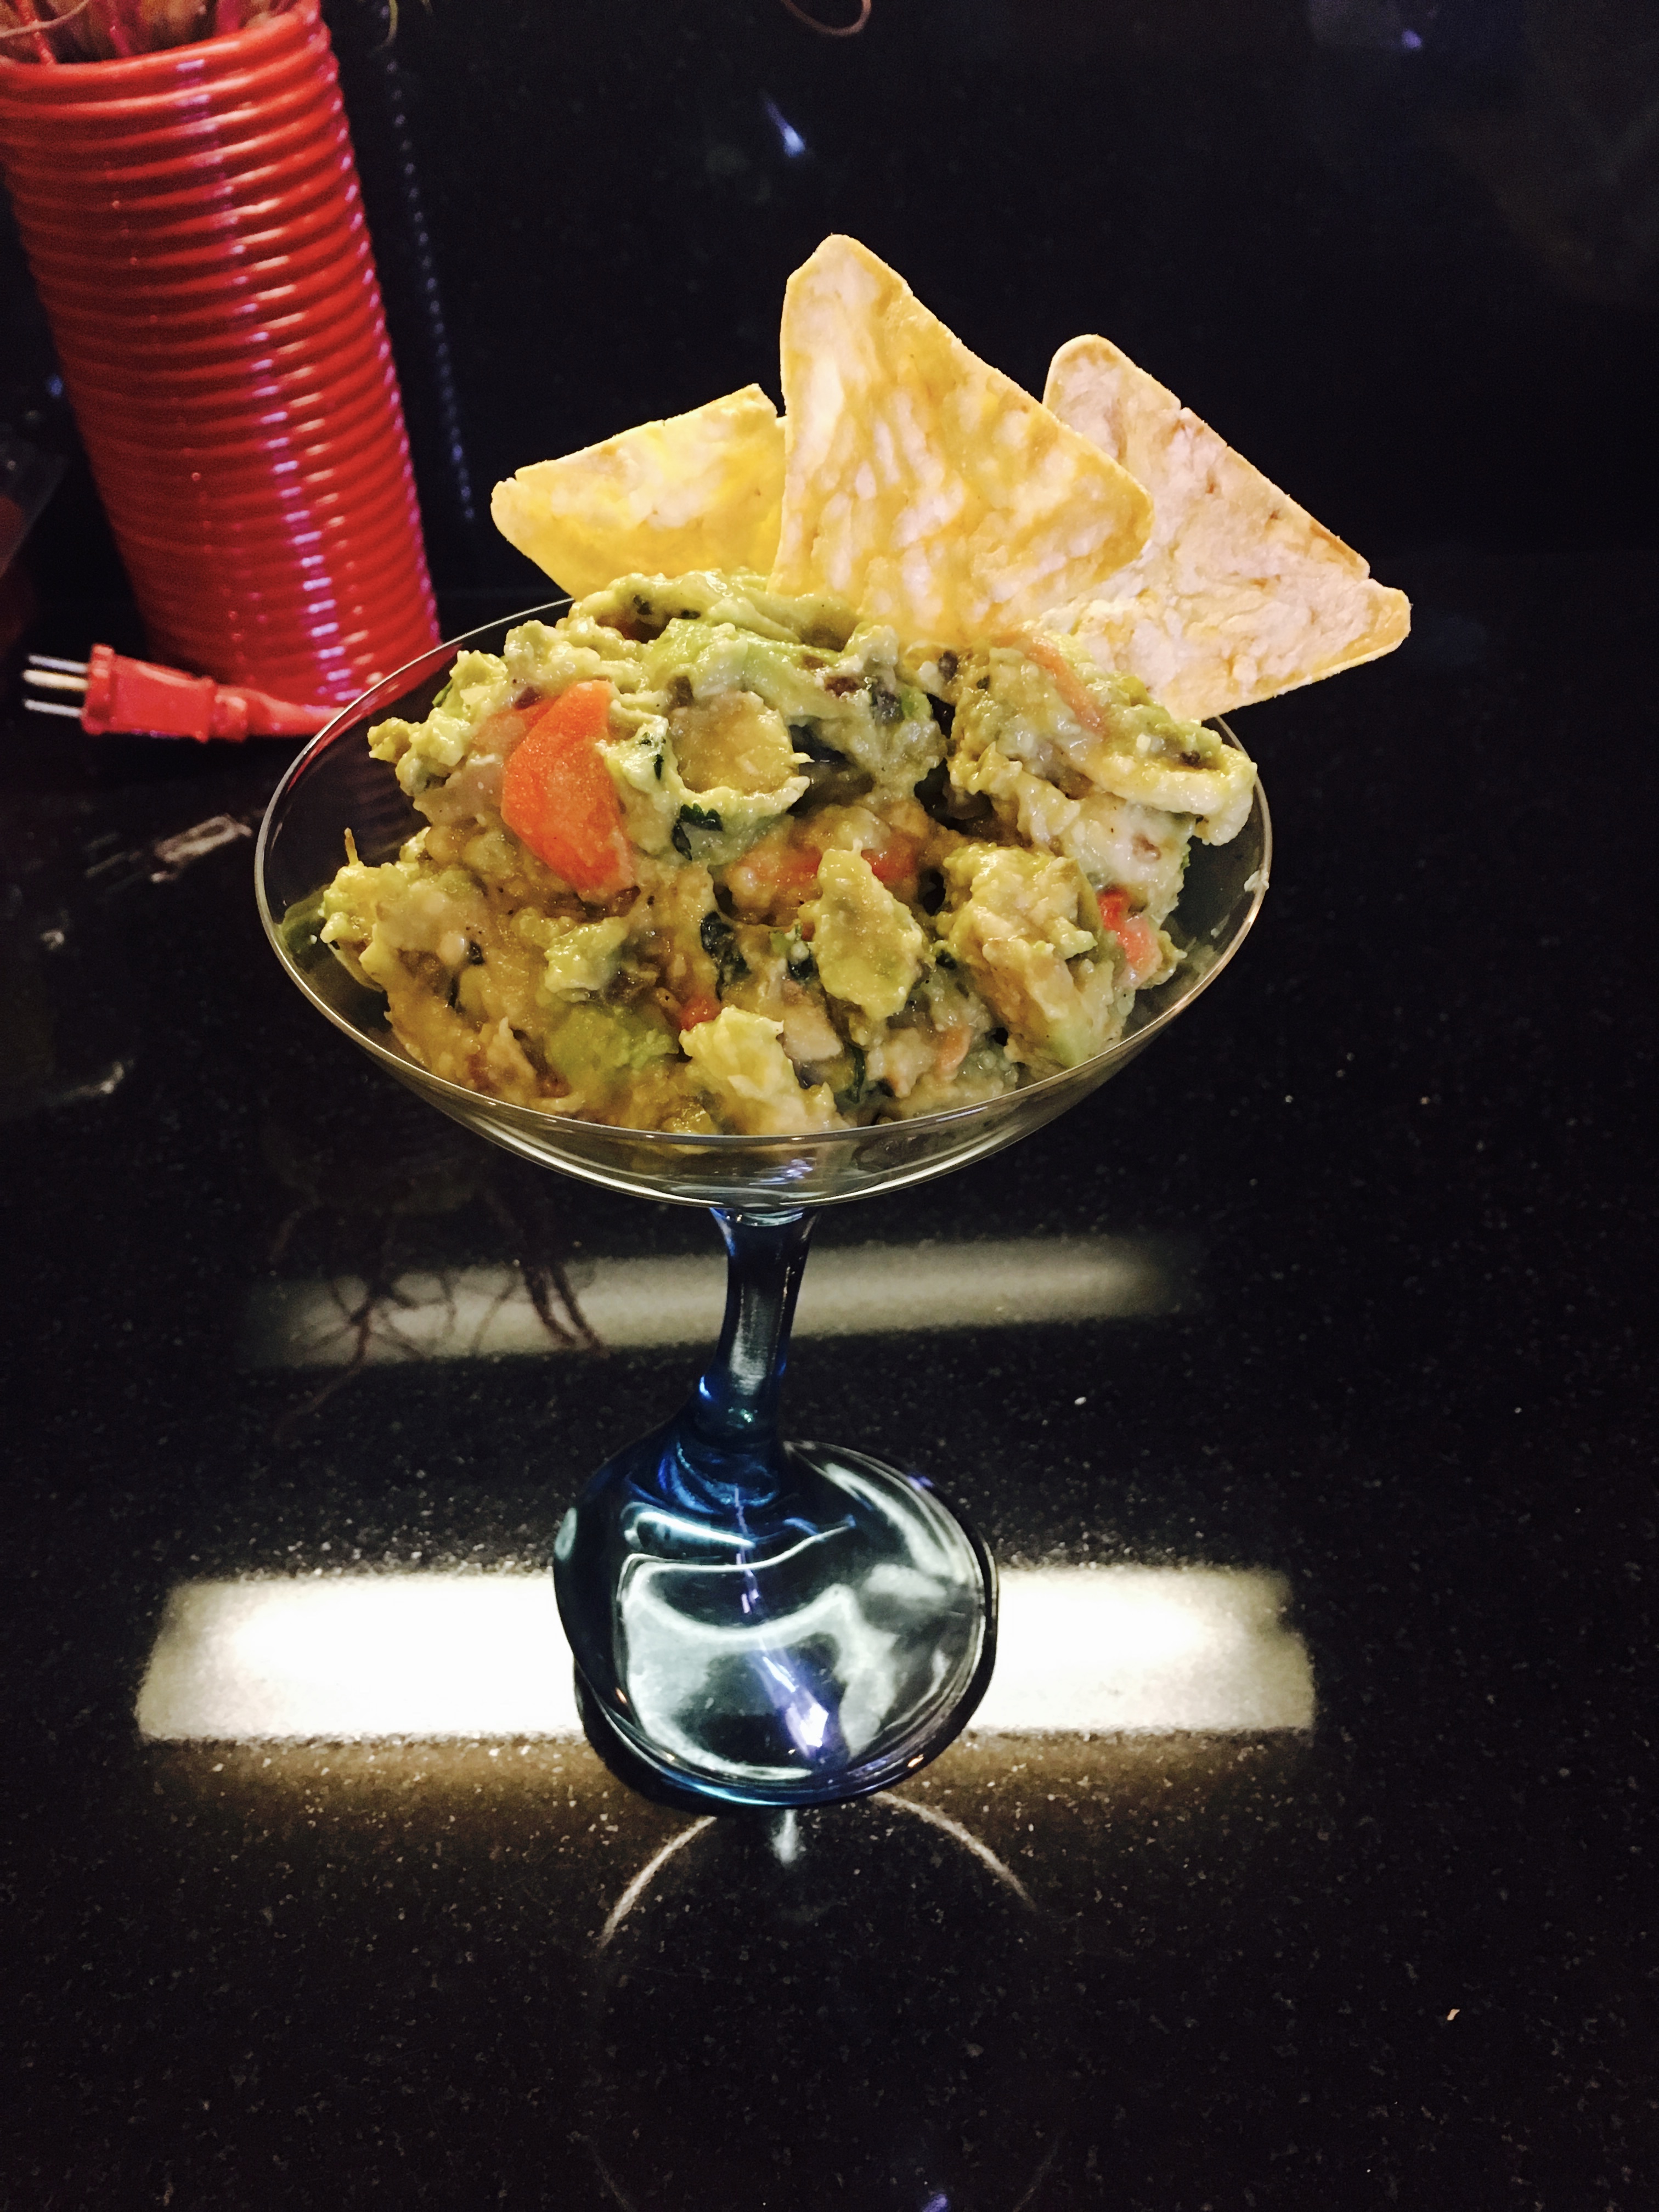
Guacamole made with the Delicious Pickled Peppers

The Forking Truth

Forking Tasty Sous Vide and Browned 1/2 Turkey Breast Recipe


Forking Tasty Sous Vide and Browned 1/2 Turkey Breast

I had a half Turkey Breast in my freezer that was already brined. To me Turkey Breast are best prepared in a Sous Vide or in the pan. Here we do both because I left the skin on. It’s incredibly easy to prepare delicious moist, tender, white meat turkey this way. The half Turkey breast goes in a Sous Vide Bag with some spices and fresh garlic and frozen garlic confit (garlic that has been roasted with olive oil and then whipped). Seal the bag and put in the Sous Vide at 140 degrees F for four-five hours. Rinse the spices off with cool water, blot dry and apply rub. Brown in a medium high pan for about three minutes a side.

Ingredients for about 6 servings

1/2 turkey breast from a medium size turkey that was brined.

3/4 teaspoon kosher salt

1 1/2 teaspoons dark brown sugar

2 juniper berries – ground

1/2 teaspoon ground allspice

1 bay leaf

pinch cinnamon

smaller pinch ground cloves

1 1/2 teaspoon black pepper

pinch hot crushed red pepper

1/4 teaspoon paprika

1 1/2 teaspoon coriander

1 1/2 teaspoon mustard

pinch white pepper

6 garlic cloves – smashed

2 oz FROZEN garlic confit

2 teaspoons black pepper (for rub)

1 teaspoon coriander (for rub)

1/4 teaspoon smoked paprika (for rub)

1/4 teaspoon granulated garlic (for rub)

1/4 teaspoon granulated onion (for rub)

1/2 teaspoon (the Sous Vide Seasoning Mixture) (for rub)

1/4 teaspoon course sea salt (for rub)

2 Tablespoon vegetable oil

Directions

Set the Sous Vide with water and set to 140 degrees F.

In a small mixing bowl combine kosher salt, brown sugar, juniper, allspice, cinnamon, cloves, 1 1/2 teaspoon black pepper, ginger, paprika, coriander, mustard, white pepper. Mix well.

Place the turkey breast in the Sous Vide Bag. Add one Tablespoon of the Sous Vide Spice mixture to the top of the breast and add one Tablespoon Sous Vide Spice mixture to the other side of turkey breast. Add the smashed garlic and the frozen garlic confit. Seal bag and then place in Sous Vide Machine for five hours.

After  5 hours run the bag under cold water to stop the cooking process.

Remove the turkey from bag and rinse off the garlic cloves and spices.

Blot dry with paper towels.

Apply the rub mixture.

Put a large fry pan on medium high heat with the vegetable oil.

Fry turkey about three minutes on bottom, top and sides.

Forking Tasty Sous Vide and Browned 1/2 Turkey Breast

It wasn’t what I was going for but It came out really delicious…it was too good not to write down so here it is!

It’s moist ,tender and juicy with exotic flavors.

The Forking Truth


Delicious Kabocha Squash Pie with a Coconut Crust Recipe


Delicious Kabocha Squash Pie with a Coconut Crust

Kabocha Squash is one of the healthiest, most delicious low calorie foods out there. It creamy and sort of sweet and it kind of taste like sweet potatoes mixed with chestnuts. I’ve been thinking about baking a pie out of Kabocha Squash for a long time now and finely came up with a recipe. I didn’t want it to come out just like pumpkin pie so I thought coconut would go really well so I made a tender coconut crust and instead of milk for the custard I used coconut milk and it’s seasoned it’s own way. This is a very unique and delicious pie that you won’t get to taste unless you make it.

Ingredients for about 8 servings

1/2 cup flour

1/2 cup coconut flour

1/4 cup extra virgin olive oil

1 Tablespoons cold water

2 Tablespoons dark brown sugar

1/2 teaspoon sea salt

non stick spray

2/3 cup kobocha squash –  roasted. pierced squash all over with knife till “knife” tender.  Seeds, membrane, stem removed then meat scooped out  (my large kobocha went into a 400 degree F oven covered with maybe 1/4 in. water I checked at 45 minutes and every 15 minutes till knife tender) – mashed well or pureed

2 1/2 Tablespoons sweet butter – room temperature

1/2 cup and 1 Tablespoon dark brown sugar

2 Tablespoons flour

3 XL eggs – slightly beaten

1/3 cup coconut milk

1/4 teaspoon cinnamon (I used Vietnamese Cinnamon)

1/8 teaspoon ground ginger

pinch white ground pepper

pinch sea salt

Directions

Turn oven to 350 degrees F.

In a large bowl combine 1/2 cup flour, coconut flour, olive oil, water, 1/2 teaspoon salt, 2 Tablespoons sugar and mix well. Mixture should look like wet crumbly sand.

Spray pie plate with non stick spray. (I think my pie plate is 11 inches)

Dump crust mixture on to pie plate.

Pat mixture into pie crust shape.

Peirce crust all over with a FORK.

Set oven to 300 degrees F.

Place in over for about 10 -12 minutes. Till crust looks sort of cooked.

Set crust to the side. Don’t worry if it doesn’t look perfect because it gets covered with filling.

In a large bowl combine remaining ingredients ONE AT A TIME in order till done.

Pour into pie shell.

Place in oven for about 35 minutes. (I note timing may differ due to different size pans and different ovens) The filling might puff up a bit but will fall and be flat.

Kabocha Squash Pie with Coconut Crust

Chill and serve at room temperature for best taste and texture.

It came out pretty darn great. I think this is what a Kabocha Squash Pie should taste like. The filling is custardy unique and delicious…. You can taste the Kabocha Squash laced with Coconut. The crust is tender and coconut flavored.

If you are a fan of Kabocha Squash and Coconut you will enjoy this pie. My husband doesn’t enjoy coconut ever and even he thinks this pie is delicious.

The Forking Truth

Chicken, Liver and Rice Meatballs Recipe for Dogs


“What are you making me….It smells Forking Delicious!”

For a special occasion or if your dog is very sick like my 15 3/4 year old is…You need to serve special foods that your dog enjoys to keep him eating. My dog LOVES Liver but liver is too rich to feed in meal amounts. I added rice and ground chicken to stretch out the taste of liver. I recommend only leave what your dog will eat in the refrigerator for up to two days and keep the rest of the balls frozen. Serving size will differ depending on size of dog. My dog weighs 60 pounds and he eats 6 balls a day (with other foods) without any issues. He loves this recipe. It’s one of his favorites.

Ingredients that makes about 48 balls

1 lb chicken livers (my package was slightly under)

4 Tablespoons either chicken fat or unsalted butter (2T for liver and 2T for rice)

4 cups chicken stock

2 cups dry white rice

1 lb ground chicken

3 XL eggs lightly beaten

a few cracks fresh ground sea salt

a few cracks fresh ground black pepper

about 8 Tablespoons extra virgin olive oil

Directions

Set oven to 350 degrees F

Spread out the chicken livers on a baking sheet and split the two tablespoons of butter or chicken fat into about 8 pieces and place over livers.

Place in oven and cook 30 minutes. When you pull the livers out hit them with a light sprinkle of salt and pepper.

While the livers are cooking you can prepare the rice.

Put 4 cups of chicken stock in a pot with 2 Tablespoons of either butter or chicken fat and bring to boil.

Add rice, then cover and reduce to simmer for twenty minutes. Take off heat and fluff rice.

By now the livers will be done. Get a potato masher and mash them like potatoes on the pan with juices and all.

Chicken livers will cool fast but wait till the rice is just warm and then combine the rice with the mashed livers. Then add beaten eggs and then mix in ground chicken.

The mixture will be soft so you need to use a meatball scoop.

Sprinkle olive oil on your sheet pans. I use a paper towel and make sure the whole surface has a light coating of oil.

Scoop out the balls.

Mine were done in 15 minutes at 350 degrees F.

“Oh Fork that smells so good….I hate waiting for them to cook….I want them now!”

The dog is waiting by my feet for the Chicken, Liver and Rice Meatballs.

Chicken, Liver and Rice Meatballs for Dogs Recipe

People can eat these balls too but they only taste like chicken liver with a better texture.

The Forking Truth


Nigel Slater’s Extremely Moist Chocolate Beet Cake Recipe Simplified


Nigel Slater’s Extremely Moist Chocolate Beet Cake Simplified

Beets were on sale this week for on .88cents a bunch and I haven’t baked desserts with beets before so I thought I’d find a great recipe for baking with beets. YES Nigel Slater’s Recipe is Iron Clad Fantastic. It might be that one recipe you want if you want that one really awesome tasting chocolate cake. The recipe is so good I didn’t even need to read the directions. It’s somewhat involved and many bowls need to be used.  I simplified the recipe by bringing down 5 bowls to only two bowls to prepare the cake. The only major change I did to the recipe was to leave out the 1/4 cup of hot espresso because that would never be in my kitchen and I don’t want the added deepness in flavor because it’s deep enough. The suggested topping for the cake is creme fraiche with poppy seeds. That sounds amazing……but I don’t feel like running to the store to spend $6.00 on a small tub of creme fraiche………so I just used 3 oz of 63% all natural cacao chips melted with 2 oz sweet butter and a splash of warm cream. The cake is super moist and very decadent with deep chocolate flavor. You might not notice the beets. The beets are only in the background and you see a the slight color difference. I was about to use a fresh ricotta cream – mascarpone  with the cake maybe tinted with some beet puree …but didn’t this time……maybe next time… Here’s the simplified recipe.

Ingredients for about 10 servings

8 oz beets – roasted with just water and then peeled and pureed (you need one cup of puree)

7 oz fine dark chocolate (the best my store sells is 63% all natural cacao) (optional to purchase a 10 oz bag of 63% chocolate chips and use 7oz for the cake and three oz for the topping)

8 oz unsweetened butter – cold temperature (optional extra 2 oz for topping)

1 cup flour – plus extra for dusting the springform pan

1 1/14 teaspoon baking powder

3 Tablespoons quality cocoa powder

5 XL eggs

1 cup sugar

optional creme fraiche and poppy seeds to serve

non stick spray

Directions

Set oven to 350 degrees F

in a large bowl chop up the butter into cubes and either put the bowl over a pot of heated water or being very careful micro wave it covered with plastic wrap for 30 seconds at a time till it’s half melted. Then add the chips and either way slowly melt the chips into the butter. (this is the hardest part of the whole recipe).

Add the sugar mix.

Add the beet puree and mix.

Add the cocoa and mix.

dump the flour and baking powder on top.

set to the side

In another large bowl add the eggs and with a mixer beat the eggs till they are light and fluffy.

With a fork stir the chocolate and beet bowl till the mixture is almost mixed.

Carefully as possible stir in the eggs till the mixture is incorporated.

Spray the springform pan with non stick spray.

Add a few Tablespoons of flour and shake it around the pan till it’s dusted.

Fill with cake mixture and set in oven

TURN DOWN OVEN TO 325 DEGREES F.

In about 40 minutes the cake should be done

Leave in pan till the cake is slightly warm and run a soft knife around the cake to make sure it doesn’t stick. Slide the cake off onto a plate.

Decide on how you’d like to serve the cake.

It’s really deep with chocolate and extremely moist…you don’t really need anything but it looks naked.

A few options are….

just powdered sugar or sweetened cocoa

The suggested creme fraiche and poppy seeds

3oz deep chocolate chips melted with 2oz unsweetened butter and a splash of warm cream.

Sweetened fresh made ricotta – mascarpone  cheese….maybe tinted with beet puree…drizzled with chocolate or chocolate shavings…..

Nigel Slater’s Extremely Moist Chocolate Beet Cake Simplified

The cake is excellent…Everyone will love this cake!

The Forking Truth


Modern Nontraditional Reduced Fat Avocado Green Goddess Dressing Recipe


Modern Reduced Fat Avocado Green Goddess Dressing

Green Goddess Dressing is an old fashioned dressing that is traditionally made from mostly all high fat ingredients like, Mayonnaise, Creme Fraiche and Sour Cream blended with green herbs. I enjoy high fat foods like everyone else does but I prefer my salads to be somewhat healthy so I came up with this recipe. Traditional Green Goddess dressing does NOT contain avocado. I had some extra avocado so I thought I could make a rich tasting Green Goddess type of dressing and I did. You can use this dressing for salads, chicken salad, dip or drizzle it on vegetables, chicken or fish.

Ingredients for about 4 servings

8 oz ripe avocado

3 Tablespoons fresh squeezed lemon juice

1/4 cup scallions sliced (packed tight)

1/4 cup parsley (packed tight)

8 anchovy filets (I used Delallo Brand…I note some other reasonably priced brands sold in Phoenix will not work out as well)

3 Tablespoons white vinegar

1/4 cup water

1 Tablespoon dried tarragon…..(fresh would be better but I very rarely use tarragon..so I usually use dried)

1/4 teaspoon or to taste fresh ground black pepper…( I found after I made the dressing I needed slightly more than 1/4 teaspoon)

Fresh ground sea salt to taste….(not much)

Directions

Just blend all the ingredients.

Modern Reduced Fat Avocado Green Goddess Dressing

This dressing seems very rich and is delicious.

The Forking Truth


Forking Awesome Kicked UP Waldorf Inspired Salad Recipe


Forking Awesome Kicked UP Waldorf Inspired Salad

The Waldorf Salad was created in the 1890s at the Waldorf Hotel in New York City. A typical Waldorf Salad is made from apples, celery, grapes and walnuts dressed with a mayonnaise dressing. That sounds sort of boring and heavy to me so I went with that idea and used some unusual ingredients like kumquat, rambutan and tomatillo that made it more interesting. There is a lot of flavors and textures in this salad with a little heat. It really is Forking Great….most people will like all the flavors and textures. Even if you don’t want to make this salad you will still want to make the walnuts like I do. I cook the walnuts with water for 3 minutes in the microwave to release the bitter flavor and toss the walnuts in the oven with minimal amounts of sugar, oil and seasoning and they are just delicious! My recipe makes more walnuts than you need for this recipe. I don’t think you will have a problem using them or snacking on them.

Ingredients for about three servings

1 cup walnuts

2 cups water

1 Tablespoon extra virgin olive oil

1 Tablespoon sugar

1/2 teaspoon sea salt

1/4 teaspoon cayenne

a few cracks black pepper

12 rambutan – peeled (you can substitute lychee fruit or large grapes)

2 celery ribs – peeled and cut in bite size pieces

1/2 fennel bulb – core removed and sliced thin (save some fennel fronds to toss in)

1 tomatillo – cut in quarters, then eights and each eight in fourths

1 apple – cored and cut in bite size pieces

3 Tablespoons jumbo raisens

2 radish sliced thin

2 kumquats sliced thin (remove seeds if you come across any)

1 Tablespoon fresh lime juice

1 Tablespoon apple cider vinegar

1 Tablespoon honey

1/2 teaspoon sea salt

1/4 teaspoon cayenne

few cracks fresh black pepper

Directions

Place the walnuts in a microwave safe bowl. Cover with plastic wrap and heat for three minutes.

Set oven to 350 dries F. When the walnuts are cool enough to handle remove from the muddy looking liquid and blot as best as you can on paper towels. This is to remove even more of the bitterness. Place the walnuts in a small mixing bowl and toss with the olive oil, 1 Tablespoon sugar, 1/2 teaspoon salt, 1/4 teaspoon cayenne and a few cracks of fresh black pepper. Toss well and spread out the walnuts on a baking sheet. Place in the oven for 15 minutes. Remove and let cool.

Cut the peeled rambutan off the pits and place in a large mixing bowl.

Add celery, fennel, fennel fronds, tomatillo, apple, raisins, radish, kumquats and remaining ingredients.

Toss.

Top with desired amount of walnuts.

Forking Awesome Kicked UP Waldorf Inspired Salad

It’s really very light delicious and different.

Most people will enjoy this salad!

The Forking Truth


Juicy Cheesy Chicken Meatballs for Man or Beast Recipe


Juicy Cheesy Chicken Meatballs for Man or Beast

I originally made these meatballs for my 15 1/2 year old dog that is dying from cancer but my husband ate some of these meatballs and said they are delicious and too good for the dog. That is the reason I named the chicken meatballs “for man or beast.” I do note that not all dogs can digest milk and cheese. Some dogs can only eat a small amount without problems. Most but not all of the dogs I have and had do or did well with milk products. My childhood Miniature Schnauzer used to drink up the cats milk bowl every day and lived to be 18 years old. These are the only meatballs I ever made that don’t have onion or garlic in them. They still came out flavorful and delicious. The suggested serving size is for people. For a dog it depends on the tolerance of dairy and size of dog.

Ingredients for about 5 servings

1 lb ground chicken

1/3 cup whole oats (not instant)

1/3 cup whole wheat panko

1 XL egg – slightly beaten

1/2 cup ricotta cheese – preferably home made

1/2 cup Italian blend cheese – shredded – (I make big batches of blend that I keep frozen till needed of 1.5 lb mozzarella, 1 lb provolone, 8 oz sharp provolone, cup parmesan)

1 teaspoon dried oregano

1 teaspoon dried basil

1/4 teaspoon sea salt

1/4 teaspoon black pepper

Tablespoon extra virgin olive oil

Directions

Set oven to 350 degrees F

In a large bowl mix everything together except for the olive oil.

Get baking sheet(s) and oil the pan.

Use a small scoop and shape meatballs (I made 23 meatballs)

Place in oven till done. (15-20 minutes)

“It smells Forking Awesome.” “What am I getting?”


Juicy Cheesy Chicken Meatballs for Man or Beast

“Them Meatballs are Forking Great!” “What are you going to make me next?”

The Forking Truth


Avocado Cilantro Caesar Dressing Recipe


Romaine dressed with Avocado Cilantro Caesar Dressing

Real Caesar Dressing is never white and is suppose to be very bold in flavor. It’s not Caesar unless you have flavors of garlic, anchovy, lemon juice, fresh cracked black pepper all equal in flavor with none outshining the others. Believe me I know…..back in the day I did this professionally. Here is an avocado variation of what caesar is suppose to taste like. I don’t usually use the oil from the anchovies but I found that the King Oscar brand that my local store sells to be the mildest, tiniest, (worst) anchovies I have ever come across and for the recipe to work out I needed to fortify the flavor with the anchovy oil. If you got good anchovies you might want to substitute olive oil instead to the one Tablespoon of anchovy oil that’s listed in the ingredients. A good anchovy is one that has some body to it. It should be about as long as your thumb. You should be able to lift each filet out of it’s container. The King Oscar Anchovies almost dissolve instantly. Sadly King Oscar Brand were the only brand of anchovies my local Safeway Store sells.

Ingredients for 4 servings

2 garlic cloves – ground to paste

4 anchovies – (note- quality and size of anchovies differ greatly, 4 from a small can, I used King Oscar because that was my only choice and found out the anchovies were very mild and very tiny….Good quality big ones you might need less)

1 XL egg yolk

2 Tablespoons dijon mustard

4 Tablespoons extra virgin olive oil

2 Tablespoons red wine vinegar

1 Tablespoon lemon juice – fresh squeezed

1 Tablespoon oil from the anchovies

1/4 teaspoon Worcestershire sauce

1 avocado – just the creamy flesh

1/2 cup cilantro – finely chopped

3/4 teaspoon black pepper – fresh ground

sea salt – fresh ground to taste

Directions

If you are doing caesar table side you need a large wooden bowl and you use two forks to break down the garlic and then break down the anchovies with the two forks like this. Or you can simply ground the garlic on a garlic grounding board and then use the two forks to break down the anchovies.

With the fork beat in the yolk till it thickens.

Mix in dijon till it thickens.

Mix in one Tablespoon olive oil till it thickens.

Mix in one Tablespoon vinegar till it thickens.

Mix in one Tablespoon olive oil till it thickens.

Mix in one Tablespoon vinegar till it thickens.

Mix in one Tablespoon olive oil till it thickens.

Mix in one Tablespoon lemon juice till it thickens.

Mix in one tablespoon olive oil till it thickens.

Mix in Worcestershire sauce.

Mix in anchovy oil till it thickens.

Mix in avocado till it’s smooth.

Mix in remaining ingredients, taste and adjust.

Avocado Caesar Dressing

Serve..Spread the dressing heavy on a cleaned 1/2 head of romaine that is chilled or grilled (or tossed in torn romaine). Top with roasted red pepper strips, either parmesan or cotija cheese, some more anchovies, toasted pumpkin seeds or seasoned croutons, scallions and maybe a little fresh cilantro. A few pieces of grilled chicken will turn this salad into a dinner.

Romaine dressed with Avocado Caesar Dressing

Forking Good!

The Forking Truth


Vivian Howard’s Best Pickled Beets She Ever Ate Recipe


Chef Vivian Howard’s “Best Picked Beets She Ever Ate”

Chef Vivian Howard is a James Beard Foundation Award Semi Finalist, She also runs her own AAA Four Diamond Restaurant, she is a host on her Award Wining PBS “A Chef’s Life” TV Show and Cook Book Author. If Someone like Chef Vivian Howard says these are the “Best Pickled Beets She Ever Ate then they must be Forking Great!

Ingredients for about 12 servings

3 lbs beets

3 cups cider vinegar

2 cups water

1 cup granulated sugar

1/2 cup light brown sugar

3 cloves

3 bay leaves

2 teaspoons dried thyme

1 teaspoon chili flakes

3 star anise

Directions

Put the washed skin on beets in a pot and cover with 2 inches of water.

Boil covered for about 20 minutes or knife tender.

Drain and cool. – Peel when cool.

Slice in 1/2 inch half round and quarter if they are real big.

Combine the rest of the ingredients and bring to boil.

Pour over beets.

Refrigerate and they will be good for three months or can if you want to hold them longer.

Chef Vivian Howard’s “Best Picked Beets She Ever Ate”

These pickled beets are more firm than how I usually do pickled beets. They also are spicier and are infused with more flavors and are not sweet. For me they needed a week for the flavors to develop.

On the TV PBS TV Show A Chef’s Life they had a Beet Farmer on the show doing his version of pickled beets and his trick was to boil the beets leaving the greens on. He said the beets bleed out when you cut the leaves off. I tried it doing a basic pickled beets recipe with just plain white vinegar, sugar and water like the farmer did and the beets do have a much earthier flavor leaving the greens on.

With the extra beet brine from all the beets I’ve been pickling I used some for mini cucumbers for salads.

I also pickled some eggs and made tiny open faced sandwiches.

Chef Vivian Howard’s “Best Picked Beets She Ever Ate”

Enjoy!

The Forking Truth